
 |
Touch of class
Simple garnishes add a touch of
sophistication to the average plate
» Make a vegetable cup
» Guide to garnishes and tools
With steady, smooth strokes and the precision of an artist, chef/instructor Grant Sato cuts and pulls, peels and slices, transforming a mere papaya into a work of art.
It was clear that this garnishing course -- taught through Kapiolani Community College's culinary arts program -- was not for dummies.
No parsley sprigs and sliced oranges here. Instead, fresh herbs, fruit and vegetable carvings and oils and reductions took center stage.
Garnishes have definitely risen in status. No longer are they mere afterthoughts on a plate, but rather, accompaniments to a dish.
Balance is the key, explains Sato. Color, texture and flavor all play a role in heightening the appeal of a dish, but all the elements need to complement one another, not overpower.
Colorful fresh flower petals can brighten up an otherwise monotone salad, a swipe of burgundy reduction painted on a plate can add dramatic design as well as an enticing aroma, a drizzle of cilantro or scallion oil can offset the heaviness of a rich butter sauce. For dessert, a crunchy stick of candy or wafer can add dimension to a smooth and creamy panna cotta or crème brulée.
Although they can be sophisticated and elaborate, garnishes are by no means unapproachable, Sato says. With some forethought, patience and a bit of practice, anyone can turn a plain plate into a work of art.
How to make a Crown
Papaya Vessel
|
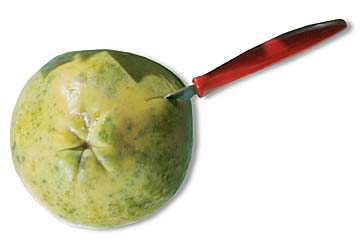
1. Start with a firm, not-too-ripe papaya. Draw a ring around the fruit about 1 inch from the top and another 1 inch from the bottom. Draw a zigzag pattern connecting the top line to the bottom line, making five points. Using a hummingbird knife, cut along your zig-zag lines into the flesh about an inch, until you feel the seeds.
|
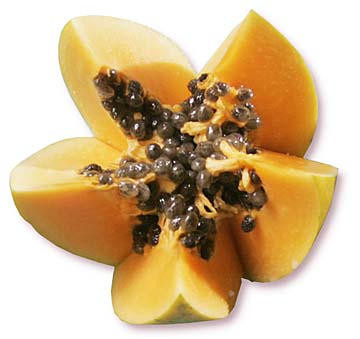
2. Twist the top and bottom portions of the papaya apart. You will have two "crowns," each with five petals. Remove the seeds. Slice off a bit of the base of each crown so they will sit upright.
|
3. Carefully cut three tiny notches on each side of each petal, at 45-degree angles. Be careful not to cut too deeply. Then, working from the outer skin side of the papaya, cut an upside-down V into each petal about a half-inch from the top (this step is not pictured).
|
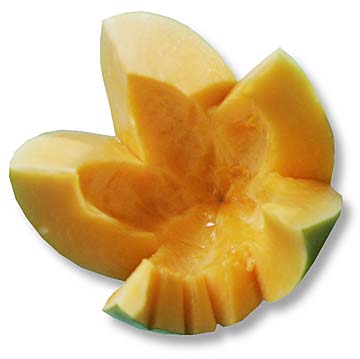
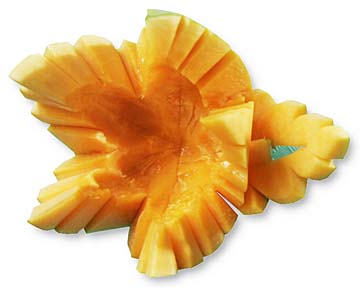
4. Working from the tip of each petal, cut through the flesh, following the curvature of the fruit, to create two layers -- one of flesh, the other of skin with a thin layer of flesh. Push the V that you cut into each petal into the fruit. This will make the petals "bloom." Each crown will now form a bowl that you can fill with fruit or cottage cheese.
|
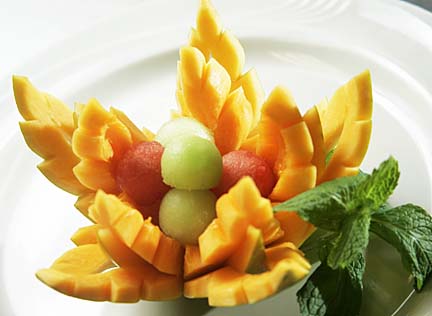
5. The finished carved papaya resembles a blossom, each petal double-layered. Fill the crown with melon balls, lychee, pineapple or other fruit pieces.

|
How to make a
vegetable cup
Create a simple garnish using a carrot or cucumber, using a "cut-and-pull" technique.
|
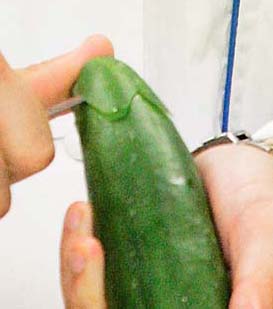
1. Using a hummingbird or paring knife, start 1 to 2 inches from the tip of the vegetable. Make a series of cuts all around the vegetable to create five petals. Cut toward the center, following the contour of the vegetable, close to the skin.

|
2. Your cuts should meet in the center, allowing you to pull off the tip. Make another series of cuts a quarter-inch below the first. (The hummingbird knife is curved and will make round petals. A paring knife will make pointed petals.)
|
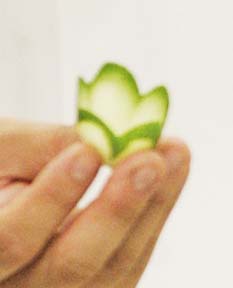
3. Pull off the next cup. With practice you will have a nearly translucent tulip-shaped cup that can be filled with tuna salad or a dip. Keep working down the vegetable to make more cups.
Guide to garnishes
Chef/instructor Grant Sato offers these tips for turning a simple plate of food into a work of art:
» Keep garnishes to a minimum. They should compliment the patterns, color, texture, design elements and food components of the dish.» Garnishes should be of a temperature and flavor composition to match the dish.
» Consider using garnishes, such as carved fruit bowls, as edible serving dishes.
» Garnishes must be edible, although they won't always taste good (some are strictly for looks, not flavor).
|
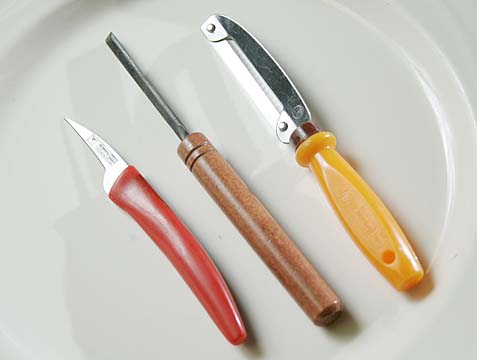
Tools
The basic tools for fruit and vegetable carving, from left in the photo above:» Hummingbird knife: Like a curved scalpel, this knife may be found in specialty culinary stores or Asian markets. It is often used in Southeast Asia, where the most dramatic edible carvings are created. A paring knife may be substituted.
» Groover chisel: Available at hardware or art-supply stores, normally used for woodworking or leather and vinyl craft work.
» Vegetable peeler: This peeler is from Thailand, but any peeler is sufficient.
E-mail to Features Desk
[News] [Business] [Features] [Sports] [Editorial] [Do It Electric!]
[Classified Ads] [Search] [Subscribe] [Info] [Letter to Editor]
[Feedback]