
By Tim Ryan
Star-BulletinMy deck was a wreck. I used it, abused it, took it for granted, and never maintained it; not even to give it a quick bath.
"Payback time," said carpenter Dennis Casar, owner of Finicky Finishes, a residential, commercial and nautical wood repair business based in Honolulu.
My 10-foot-by-30-foot deck takes the brunt of use from family, friends, dogs with pesky claws, lawn furniture with sharp edges, barbecue grease and the occasional surfboard repair. And, like most decks in Hawaii, it sits directly in the weather, battered by rain, fried by the sun.
My deck problems were pretty common, Casar said: Peeling paint, rotting gouges, cupping, cracks, chalking and popped nails.
A real mess. Something had to be done; and on a low budget.

"Most people want to build a whole new deck because they haven't taken care of their old one," Casar said. "It's smarter to spend money on preserving the existing deck. Don't cut corners."Decks should be cleaned when dirt and algae appear, said Frank Suster, City's Mill's training coordinator.
"Mildew thrives on paint, then after it gets through the paint it attacks the wood underneath," he said.
Apply a chemical cleaner with a large stiff scrub brush, then use a dull knife to clean out the dirt and debris from the cracks. Finish it off by washing with a pressure washer, Suster said.
And where paint on my deck had chipped, water leaked and the wood was rotting and warping.
"When wood expands, it warps and starts popping out the nails, then water gets in through there," said Laiku Soares, a City Mill lumber supervisor.
Casar said it was possible to save money if I could do some of the work myself, even reusing some of the old wood by turning the bad boards over, then sanding them and repainting.
The cost of refurbishing an old deck like mine, including the prep work -- scraping and/or sanding, washing, caulking and patching as needed -- along with priming and two coats of paint, is about $2.15 a square foot plus materials.
A new deck would cost $3.25 a square foot plus the cost of planks.Finicky Finishes is most noted for its work on yachts, particularly high-gloss finishes. The company is expanding to home projects, including deck renovation.
If you decide to hire a professional company, you might be able to negotiate lower rates if you're willing to do the grunt work. More about that later.
I removed 60-plus damaged 2-by-4 steps myself. Most were salvageable by flipping them over, then sanding, priming, painting and nailing them back in place.
A few steps were so badly damaged I did have to buy new lumber. But the total price for these steps was under $50 ,including paint.
One mistake I made, Casar pointed out, was not spacing the step planking far enough apart -- usually 1/8 inch -- to let the wood breathe and water drain.
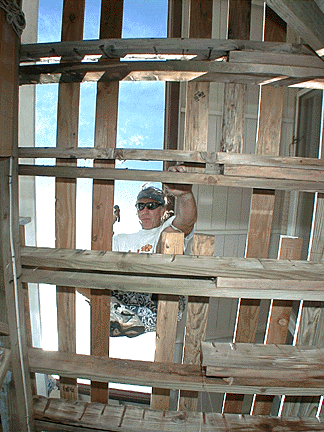
Most of the top-deck planks -- more than 100 1-by-4s up to 16 feet long -- had to be replaced. That took about four hours of prying, but saved me about $150 I would have had to pay someone else. (Sawing the planks into smaller lengths made removal easier with my crowbar -- a necessity.)
With two-thirds of the decking removed, I discovered a major problem. Several joists -- the lumber under the deck boards that holds them in place -- were rotten. And in one corner the deck moved up and down because those joists had rotted as well.
That's when Finicky Finishes entered the picture.
I removed the damaged wood and discarded it. I bought the new wood, paint, primer and nails and delivered it to the site. I primed and painted the decking and the joists. Finicky repaired the damage and installed the decking.
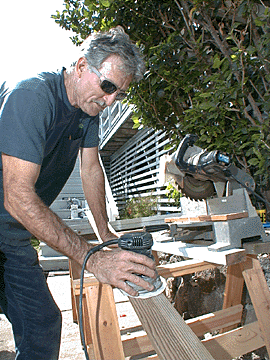
To keep the deck from moving up and down, Casar attached a piece of lumber directly to the joist where the board was the same thickness and width as the joist. He then nailed the new lumber to the existing joist at each end, using galvanized nails.Casar installed the new decking with pressure-treated Douglas fir, which is cheaper than cedar or redwood and is the most common wood for deck construction in Hawaii.
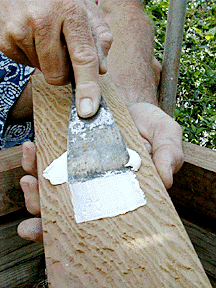
He caulked where the ends of the boards met to prevent water damage. And he brushed primer on all the surfaces of the decking wood, including the bottom. (One coat of primer is enough, Casar said.)
The preservative in treated wood provides a permanent seal. When the chemicals bond with the wood, the wood becomes more resistant to termite damage and rotting, said City Mill's Soares.
Pressure-treated wood will turn gray as it ages, if left unpainted.
"A big misconception is that pressure-treated wood will not get termites or rot and that it's going to last forever," Casar said. "Absolutely not true and that's why a deck needs regular care. Douglas fir will crack and cup."
(Cupping and cracking occur when wood becomes wet and dries unevenly, he said. The top of the wood will dry more quickly than the bottom and the edges of the boards will pull up, causing a warped look. Over time the wood will tear itself apart if it's not maintained, Casar said.)
"Depending on how dirty your deck gets, it should be checked then washed periodically," he said. "Add some bleach to the mix if you need to remove mildew. Some chemical cleaners will brighten your deck."
A solid-color stain lasts longer because the pigment in the stain protects the wood from harmful ultraviolet rays of the sun, Casar said.
Finicky Finishes can be reached at 530-6796.
DOING IT RIGHT
Building
Blunt ends of nails to keep wood from splitting.
PAINTING
Sources: Dennis Casar, Finicky Finishes, and Frank Suster, City Mill
Deck-building glossary
Sources: New York Times and Star-Bulletin
Click for online
calendars and events.